Easy Crochet Poinsettia: Free Step-by-Step Pattern
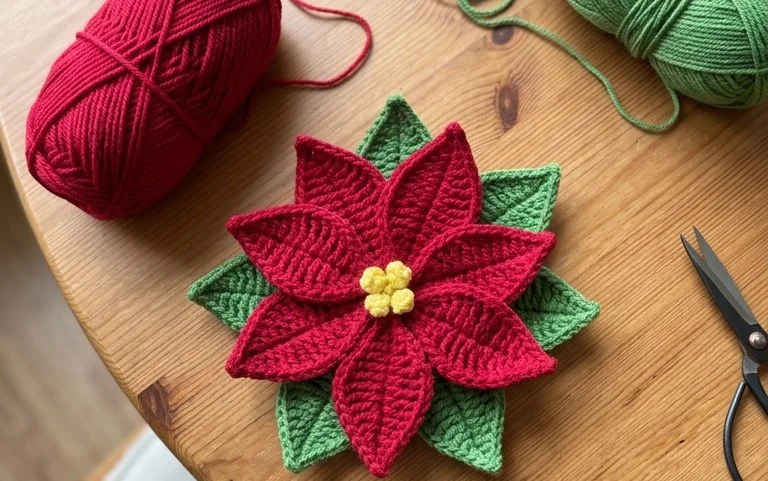
Deep red petals and a golden center create a striking holiday accent that holds its shape long after the winter season ends. This crochet poinsettia flower feels firm yet soft to the touch, making it a functional piece for wreaths, table centerpieces, or gift toppers. If you enjoy repetitive motions that lead to a polished result, you will find this project rewarding. Beginners can rely on basic stitches and simple assembly to build each petal layer. We cover how to work in rounds and join your yarn effectively to keep the center neat and tidy for a professional appearance.
Why You’ll Love This Pattern
This crochet amigurumi whale is a satisfying project because it works up quickly using simple single crochet stitches in the round. The construction relies on a classic sphere-shaping technique, making it an ideal choice for those looking to practice their tension control without managing complex color changes or intricate limb attachments. Because it uses a small amount of worsted weight yarn, you can easily pull from your existing stash to create a small school of whales in different colors. The final result is sturdy, squishy, and perfect for gifts or nursery decor.
I finished this whale in one sitting during a movie. The shaping is very logical and the instructions for the fins were easy to follow even as a beginner.
— Sarah, amigurumi enthusiast
Pattern Overview & Skill Level
- Skill Level: Beginner
- Approximate Time: 1.5 to 2 hours
- Construction: Worked in continuous spiral rounds for the body, with separate pieces crocheted and sewn on for the fins and tail.
- Finished Dimensions: Approximately 4 inches long and 3 inches wide using recommended materials.
Materials & Supplies Needed
- Yarn: Worsted weight (#4), 100% cotton or acrylic, approximately 40 yards of main color (blue, grey, or teal) and 5 yards of a contrasting color for the belly if desired.
- Hook Size: 3.75 mm / F-5. Using a hook slightly smaller than the yarn label recommends helps prevent stuffing from showing through the stitches.
- Notions: Tapestry needle for assembly, stitch markers to track round starts, polyester fiberfill for stuffing, and 8mm plastic safety eyes.
- Yarn Substitutions: Wool or wool-blend yarns will work well but may result in a slightly larger or fuzzy finished item. If you use a heavier yarn like bulky (#5), remember to increase your hook size accordingly to maintain tight stitches.
Stitch Guide & Abbreviations (US Terms)
- MR: Magic Ring
- ch: Chain
- sc: Single crochet
- inc: Increase (work 2 sc in the same stitch)
- dec: Decrease (sc2tog, inserting the hook into the front loops of the next 2 stitches)
- sl st: Slip stitch
- st/sts: Stitch/stitches
Step-by-Step Pattern Instructions
Whale Body
- Rnd 1: Start 6 sc into a magic ring. (6 sts)
- Rnd 2: Inc in each st around. (12 sts)
- Rnd 3: 1 sc, inc repeat 6 times. (18 sts)
- Rnd 4: 2 sc, inc repeat 6 times. (24 sts)
- Rnd 5-10: Sc in each st around. (24 sts)
- Rnd 11: 2 sc, dec repeat 6 times. (18 sts)
- Rnd 12: 1 sc, dec repeat 6 times. (12 sts)
- Insert safety eyes between Rnd 7 and 8, spacing them about 4 stitches apart. Stuff the body firmly with fiberfill.
- Rnd 13: Dec repeat 6 times. (6 sts)
- Fasten off, leaving a long tail for sewing. Use your needle to weave the yarn through the front loops of the remaining 6 stitches and pull to close the gap.
Tail Fins (Make 2)
- Row 1: Ch 4, sc in second ch from hook and next 2 chs. (3 sts)
- Fasten off, leaving a long tail. Sew the fins onto the back of the whale body at the center point.
Assembly
Position the tail fins horizontally at the back of the whale. Using your tapestry needle, securely stitch the fins into place, ensuring they are symmetrical. If you choose to add an optional belly patch, you can crochet a small flat circle and sew it to the bottom of the body before final stuffing.
Care & Washing Instructions
- Hand wash your finished whale in cool water using a gentle liquid detergent to maintain the shape of the fiberfill.
- Lay the piece flat on a clean towel to air dry completely, turning it occasionally to ensure even evaporation.
- If the whale becomes squashed over time, gently massage and reshape the stuffing with your hands to restore its original volume.
Pro Tips & Common Mistakes to Avoid
- Maintain tight tension by keeping your yarn tension consistent throughout. If you notice gaps between stitches where the stuffing shows, switch to a smaller hook size.
- Always place a stitch marker in the first stitch of every round. Because this project is worked in a continuous spiral rather than joined rounds, it is easy to lose track of where your round begins.
- Weave in your yarn ends by running the needle under the stitches on the inside of the piece rather than through the outer fabric to keep the exterior surface smooth.
- Adjust the size of your whale by changing the yarn weight. If you use a thinner yarn and a smaller hook, your whale will be smaller, though you will need less stuffing.
Frequently Asked Questions
Can I use buttons instead of safety eyes?
Yes, you can use buttons. Ensure they are sewn on very tightly, especially if the finished whale is intended for use by small children, as buttons can pose a choking hazard.
Is this pattern suitable for complete beginners?
This pattern is excellent for beginners because it uses only basic stitches. The most challenging part is the magic ring, but there are many simple tutorials online if you find it difficult to master on your first attempt.
Can I sell the finished whales I make?
Please check the original designer’s terms regarding commercial use. Most designers allow the sale of small-batch handmade items, but you should always credit the designer in your product listings.
What is the best way to stuff the whale evenly?
Use small, pea-sized pieces of fiberfill rather than one large chunk. This prevents lumpy sections and helps the whale maintain a smooth, rounded shape.
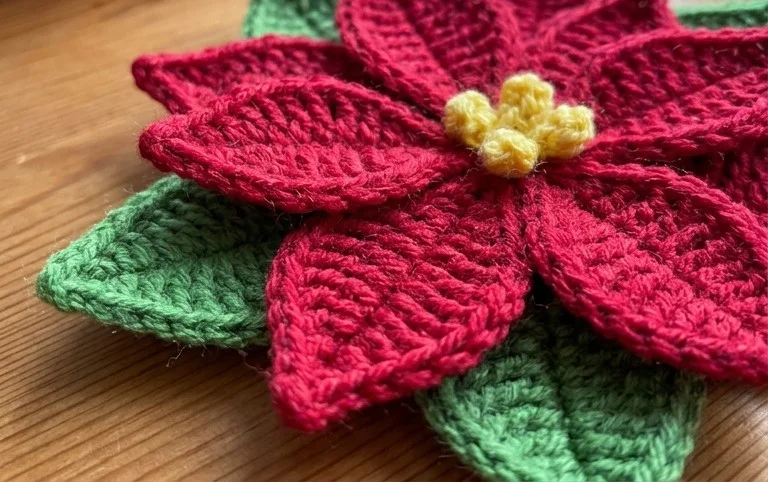
Your finished holiday flower adds a festive touch to any corner of your home, especially when tucked into a garland or tied onto a gift box. You might try making a smaller version using crochet thread for a delicate ornament or swap the classic red for white wool to mimic a snowy aesthetic. Share a photo of your handiwork on social media to show how you styled yours. Feel free to browse the blog for more seasonal projects to keep your hands busy this winter.