Free Crochet Heart Granny Square Book Cover Pattern
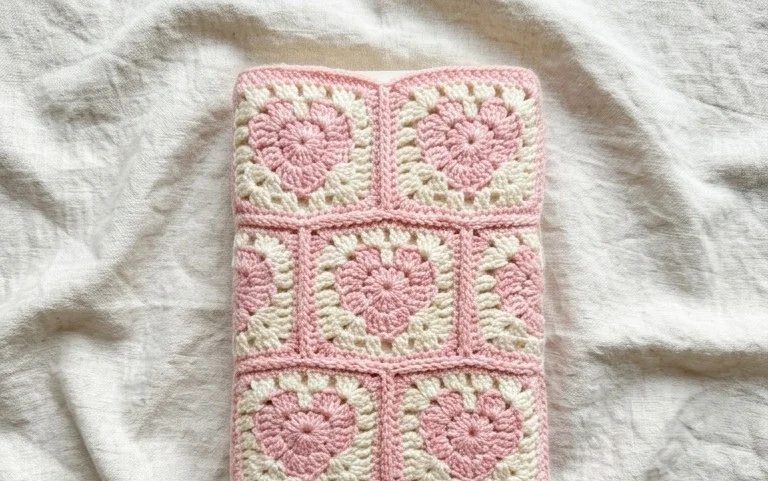
A handmade book sleeve feels sturdy in your hands and protects your favorite novel from bent corners while you commute or relax at home. This heart-centered motif sits flat against the front cover, providing a soft texture that makes reading feel more personal. You will find that joining these squares is a quiet, rhythmic process suited for anyone from a complete beginner to an experienced maker needing a quick gift project. We focus on the simple double crochet stitch to shape the heart silhouette. Working through this pattern helps you gain confidence with tension and clean color changes.
Why You’ll Love This Pattern
The Classic Crochet Granny Square is the quintessential building block for fiber artists. You will find that this pattern is exceptionally meditative due to its repetitive, rhythmic nature, making it the ideal project to work on while listening to music or watching a film. Because each square uses only a small amount of yarn, it serves as the most efficient way to use up leftover bits from larger blankets or garment projects. The construction is beginner-friendly, requiring knowledge of only three basic stitches, yet it remains popular among advanced crafters for its versatility in creating everything from bags to sweaters.
This is the first pattern that finally made the transition from flat rows to rounds click for me. It is so satisfying to see the square grow perfectly evenly every time I finish a round.
— Sarah, home crafter
Pattern Overview & Skill Level
- Skill Level: Beginner
- Approximate Time: 30 to 45 minutes per square
- Construction: Worked in rounds from the center outward
- Finished Dimensions: Approximately 5 inches by 5 inches using medium weight yarn
Materials & Supplies Needed
- Yarn: Worsted weight (#4), acrylic or wool blend, approximately 20 yards per square.
- Hook Size: 5.0 mm (US H-8).
- Notions: Tapestry needle for weaving ends, a pair of sharp scissors.
- Yarn Substitutions: You may use DK weight yarn for a smaller, tighter square, though you will need to increase the number of rounds to reach the same size. Cotton yarn is recommended for dishcloths or coasters as it holds its shape well and absorbs moisture.
Stitch Guide & Abbreviations (US Terms)
- ch = chain
- dc = double crochet
- sl st = slip stitch
- st/sts = stitch/stitches
- sp = space
- cluster = a group of 3 dc stitches worked into the same space
- shell = two clusters with a chain-2 space between them, worked into a corner space
Step-by-Step Pattern Instructions
Granny Square Body
- Rnd 1: Ch 4, join with a sl st to the first ch to form a ring. Ch 3 (counts as first dc), work 2 dc into the ring, ch 2. Work 3 dc into the ring, ch 2—repeat from * to * two more times. Join with a sl st to the top of the beginning ch-3. (12 dc, 4 ch-2 spaces)
- Rnd 2: Sl st into the next 2 sts and into the first ch-2 corner space. Ch 3, 2 dc in same sp, ch 2, 3 dc in same sp. Ch 1, skip 3 dc, (3 dc, ch 2, 3 dc) in the next ch-2 space—repeat from * to * two more times. Ch 1, join with a sl st to the top of the beginning ch-3. (24 dc, 4 ch-2 spaces, 4 ch-1 spaces)
- Rnd 3: Sl st into the next 2 sts and into the first ch-2 corner space. Ch 3, 2 dc in same sp, ch 2, 3 dc in same sp. Ch 1, 3 dc in the next ch-1 space, ch 1, (3 dc, ch 2, 3 dc) in the next ch-2 corner space—repeat from * to * two more times. Ch 1, 3 dc in the final ch-1 space, ch 1, join with a sl st to the top of the beginning ch-3. (36 dc, 4 ch-2 spaces, 8 ch-1 spaces)
- Rnd 4: Continue in the established pattern. Work (3 dc, ch 2, 3 dc) into every corner ch-2 space and 3 dc into every ch-1 space along the sides, separated by ch-1. (48 dc, 4 ch-2 spaces, 12 ch-1 spaces)
Finishing
Fasten off the yarn, leaving a 6-inch tail. Use your tapestry needle to weave the tail through the back of the stitches to secure it. If you are joining multiple squares together, do not cut the yarn too short, as you may use the excess length for seaming.
Care & Washing Instructions
- Hand wash in cool water using a gentle detergent designed for delicates.
- Lay the square flat on a clean towel and reshape it to ensure the corners remain at 90-degree angles while drying.
- Avoid wringing out the project, as this can stretch the stitches and distort the square shape.
Pro Tips & Common Mistakes to Avoid
- Consistent Tension: Keep your chain stitches between clusters somewhat loose. If these chains are too tight, the square will curl or cup like a bowl rather than lying flat.
- Stitch Counting: Use a stitch marker on the first dc of every round to easily identify where to join with your slip stitch, which prevents accidental increases or decreases.
- Invisible Weaving: When finishing, weave your ends in the direction of the stitch thread. This hides the tail within the structure of the crochet, preventing it from poking through to the front.
- Size Adjustments: If you wish to make a larger square, simply repeat the pattern of working (3 dc, ch 2, 3 dc) in corners and 3 dc in all side spaces until you reach your desired measurement. Note that each additional round will consume significantly more yarn than the previous one.
Frequently Asked Questions
Can I substitute the yarn for a different weight?
Yes, you can use any weight of yarn, but your hook size must be adjusted accordingly to maintain drape. Using a much thinner yarn with the same 5.0 mm hook will result in a lacy, hole-filled square.
Why is my square curling at the edges?
Curling usually happens if your tension is too tight or if you are skipping too many stitches between clusters. Ensure you are hitting the chain-1 spaces accurately and check that your corner chain-2 spaces are not being worked too tightly.
Can I sell the squares I make from this pattern?
You are welcome to sell finished items made from this design. Please credit the pattern designer in your product listings to help others find the guide.
How do I join these squares together into a larger blanket?
You can join squares using a mattress stitch with a tapestry needle, or use a slip stitch join through the back loops of the outer edges to create a raised, decorative seam.
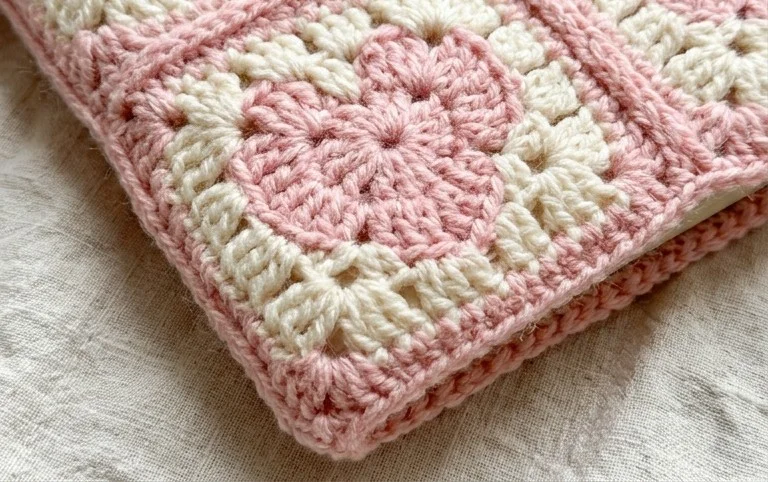
This heart-shaped cover turns your current read into a cozy accessory that stands out on any bookshelf. You can swap the standard worsted yarn for a soft velvet weight to give the heart extra dimension or adjust the chain count to fit a thicker hardcover volume perfectly. Share a photo of your finished work on your favorite social media site to show off your custom color choices. Feel free to browse our archives for more free patterns to build your library of handmade items.