Easy Sea Animal Crochet: Free Beginner Pattern Tutorial
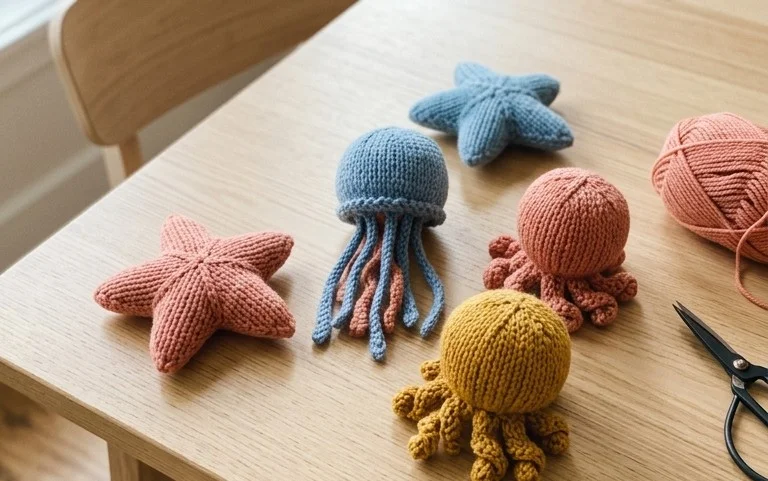
These plush ocean creatures have a soft, rounded shape that sits perfectly on a nursery shelf or tucks easily into a small gift bag. You will work with basic cotton yarn to achieve a dense, squishy texture that holds its form even after being squeezed by little hands. This project is a friendly introduction to shaping soft toys, teaching you how to increase and decrease stitches in a continuous spiral without visible seams. You finish the work by attaching simple details that give each character its own personality, making it a satisfying project for anyone practicing their basic stitches.
Why You Will Love This Pattern
This beginner-friendly project is designed to help you master the basic amigurumi technique of working in continuous rounds. You will finish the entire project in about two hours, making it an ideal choice for a quick handmade gift or a last-minute craft fair addition. Because it requires very little yarn, it serves as a practical way to use up leftover bits from your stash. The repetitive nature of the stitches creates a meditative rhythm that is easy to pick up and put down, which is perfect for working on while listening to an audiobook or watching a show.
I managed to finish this little project in one sitting, and the instructions were clear enough that I did not have to restart once. It is definitely my go-to pattern for quick gifts now.
— Sarah, amigurumi enthusiast
Pattern Overview & Skill Level
- Skill Level: Beginner
- Approximate Time: 1.5 to 2 hours
- Construction: Worked in continuous rounds from the bottom up, featuring increases and decreases to shape the body, followed by separate component assembly.
- Finished Dimensions & Sizing: Approximately 4 inches tall and 3 inches wide.
Materials & Supplies Needed
- Yarn: Worsted weight (#4) acrylic or cotton blend, approximately 40 yards in main color and 10 yards in accent color.
- Hook Size: 3.5 mm (E-4) for a tight stitch that prevents stuffing from showing through.
- Notions: Polyester fiberfill stuffing, tapestry needle, two 6mm safety eyes, and a stitch marker.
- Yarn Substitutions: You can use DK weight yarn with a 3.0 mm hook for a smaller, more delicate version, though you will need to adjust your stuffing amount accordingly. Avoid fuzzy mohair or novelty yarns, as they make counting stitches difficult for beginners.
Stitch Guide & Abbreviations (US Terms)
- MR: Magic ring
- ch: Chain
- sc: Single crochet
- inc: 2 sc in the same stitch (increase)
- dec: sc2tog (invisible decrease, working in the front loops only)
- sl st: Slip stitch
- st(s): Stitch(es)
- FO: Fasten off
Step-by-Step Pattern Instructions
Body
- Rnd 1: Work 6 sc into a MR. (6 sts)
- Rnd 2: Inc in each st around. (12 sts)
- Rnd 3: (1 sc, inc) repeat 6 times. (18 sts)
- Rnd 4: (2 sc, inc) repeat 6 times. (24 sts)
- Rnd 5-10: Sc in each st around. (24 sts)
- Rnd 11: (2 sc, dec) repeat 6 times. (18 sts)
- Rnd 12: (1 sc, dec) repeat 6 times. (12 sts)
- Rnd 13: Dec 6 times. (6 sts)
Assembly
Before closing the final round, stuff the body firmly with fiberfill to ensure the shape holds. Using your tapestry needle, weave the tail through the front loops of the remaining 6 stitches and pull tight to close the hole. Secure the yarn and hide the end inside the body. If you are adding facial features, insert safety eyes between Rnd 7 and Rnd 8, spaced four stitches apart, before you begin your decrease rounds.
Care & Washing Instructions
- Hand wash in cool water with a mild detergent to preserve the shape of the fiberfill.
- Lay the piece flat on a clean towel to air dry, turning it occasionally to ensure even moisture evaporation.
- Gently pat and reshape the item with your hands after it has dried to remove any minor compression from the wash.
Pro Tips & Common Mistakes to Avoid
Maintaining consistent tension is the most important factor in preventing holes where the stuffing shows through. Pull your yarn slightly tighter than you think is necessary on every stitch. Always place a stitch marker in the first stitch of every round; since you are working in continuous spirals, it is impossible to track your place without one. When weaving in your ends, run the needle under the stitches on the inside of the piece to keep the exterior surface clean and smooth. If you decide to increase the size of the project by adding more increase rounds, remember that each additional round will require significantly more yarn and will change the proportions of your finished item.
Frequently Asked Questions
Can I use a larger hook if my hands get tired?
Using a larger hook will result in larger gaps between your stitches. If you find the recommended hook size too straining, try a different brand of hook with an ergonomic handle rather than increasing the size of the hook itself.
Is it okay to sell items made from this pattern?
Check the copyright terms provided with your original pattern source. Most independent designers allow small-scale sales if you credit them, but always verify before listing items in your shop.
Why do my rounds look like they are shifting?
Working in continuous rounds naturally creates a slight spiral effect. This is normal for amigurumi and does not indicate a mistake in your stitch count as long as the totals at the end of each round are correct.
What is the best way to stuff the piece evenly?
Add small amounts of stuffing at a time, using the back of a crochet hook or a wooden dowel to push the filling into the edges. Avoid overstuffing, which can stretch the stitches and reveal the interior.
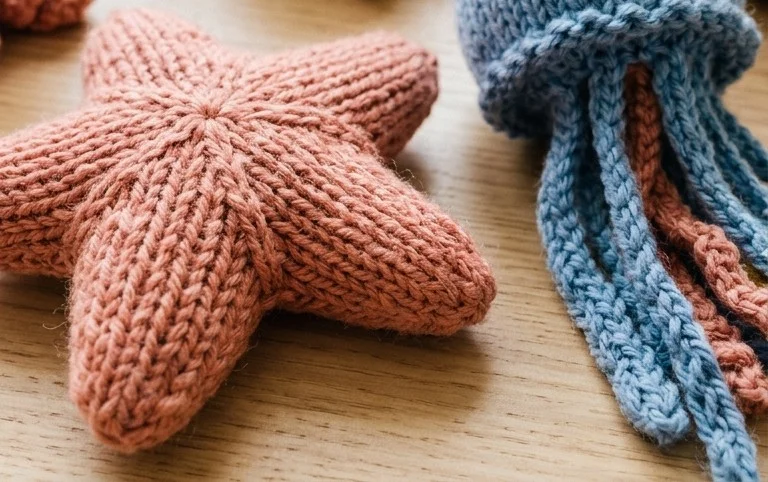
Your new stuffed sea friend looks charming sitting on a desk or tucked into a bookshelf as a handmade decorative piece. Try using a velvety chenille yarn instead of standard cotton if you want an extra soft texture, or work with a larger hook to scale the finished size up significantly. Post a photo of your completed creation online to show others how yours turned out, and check the rest of the blog for more free patterns to fill out your underwater collection.