Easy Crochet Basket Pattern: Step-by-Step Guide
This structured basket sits firmly on your desk or nightstand, holding its shape thanks to the dense, knit-like texture of the waistcoat stitch. It is a satisfying project for those who enjoy home organization and want to see quick results without spending days on a single piece. Beginners will find the repetitive motion soothing, while more experienced makers appreciate the clean, modern look this heavy cord provides. You will soon master the subtle technique of pulling your yarn through the center of each stitch, creating a durable container that feels much like a felted wool item despite using standard cord.
Why You’ll Love This Pattern
This beginner-friendly project creates a structured, durable crochet basket using the sturdy waistcoat stitch. Because it works in continuous rounds and utilizes a thicker yarn weight, the sides stand up on their own without the need for stiffeners or inserts. The pattern is highly efficient, allowing you to finish a functional home decor piece in a single afternoon. It serves as an excellent way to organize small items like keys, stitch markers, or yarn scraps while practicing a stitch that mimics the look of knit fabric.
I loved how quickly this basket worked up and the sides are impressively rigid. It is the perfect size for holding my current WIP and the instructions were incredibly easy to follow.
— Sarah, home decor enthusiast
Pattern Overview & Skill Level
- Skill Level: Advanced Beginner
- Approximate Time: 2 to 3 hours
- Construction: Worked in continuous rounds from a flat circular base upward to create a cylindrical shape.
- Finished Dimensions: 6 inches in diameter and 5 inches in height.
Materials & Supplies Needed
- Yarn: Super Bulky #6 weight, cotton or cotton-blend cord, approximately 120 yards.
- Hook Size: 8.0 mm / L-11 crochet hook.
- Notions: Stitch markers, tapestry needle, and measuring tape.
- Yarn Substitutions: You may use a heavy worsted weight yarn held double, though this will result in a slightly softer texture and may require adjusting the hook size down to a 6.5 mm to maintain tension.
Stitch Guide & Abbreviations (US Terms)
- ch = chain
- st = stitch
- sl st = slip stitch
- sc = single crochet
- inc = 2 single crochet in the same stitch
- dec = invisible single crochet decrease
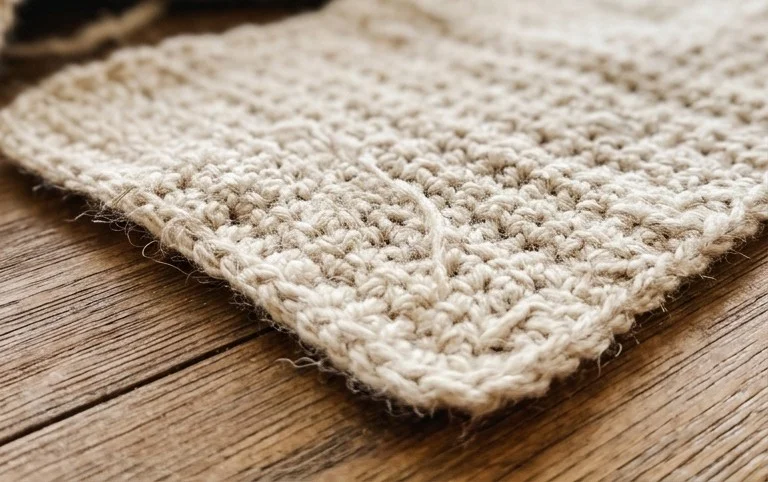
- waistcoat stitch = a single crochet worked into the “V” of the stitch below instead of the top loops.
- MR = magic ring
Step-by-Step Pattern Instructions
Base
The base is worked in standard single crochet rounds. Always place a stitch marker in the first stitch of every round to keep your place.
- Rnd 1: 6 sc into MR. (6 sts)
- Rnd 2: inc in each st around. (12 sts)
- Rnd 3: (sc in next st, inc in next st) repeat 6 times. (18 sts)
- Rnd 4: (sc in next 2 sts, inc in next st) repeat 6 times. (24 sts)
- Rnd 5: (sc in next 3 sts, inc in next st) repeat 6 times. (30 sts)
- Rnd 6: (sc in next 4 sts, inc in next st) repeat 6 times. (36 sts)
Basket Sides
Transition to the waistcoat stitch to build the vertical walls. Ensure your tension remains even so the “V” shapes align correctly.
- Rnd 7: Working in BLO, sc in each st around. (36 sts)
- Rnd 8: Working in the center of the “V” of each stitch, work waistcoat stitch in each st around. (36 sts)
- Rnd 9-18: Repeat Rnd 8 for 10 rounds or until desired height is reached. (36 sts)
- Rnd 19: Sl st in each st around to create a finished, sturdy edge. Fasten off and weave in ends.
Care & Washing Instructions
- Hand wash in cool water with a mild detergent to maintain the shape of the basket.
- Lay flat on a clean towel away from direct sunlight to air dry.
- If the basket becomes misshapen, lightly steam the sides and gently pull them into a cylindrical form while damp.
Pro Tips & Common Mistakes to Avoid
- Tension is critical for the waistcoat stitch. If your stitches are too tight, you will struggle to insert your hook into the center of the “V” in the following round.
- Use a stitch marker at the beginning of every round to avoid losing your count, especially when working in continuous spirals.
- When weaving in ends, pass the yarn tail through the underside of the internal stitches at least three times to ensure the basket remains secure during use.
- To adjust the size, simply increase or decrease the diameter of the base by continuing or stopping the increase rounds, but remember that a larger base will require significantly more yardage.
Frequently Asked Questions
Can I substitute the super bulky yarn for a lighter weight?
You can hold two strands of worsted weight yarn together to achieve a similar thickness, but ensure you test your gauge so the basket walls remain rigid enough to stand upright.
How do I make the basket taller?
Simply add more rounds of the waistcoat stitch until you reach your preferred height. Keep in mind that extra height requires more yarn and may slightly reduce the stability of the walls.
Is this pattern suitable for a beginner?
Yes, provided you are comfortable with basic single crochet and magic ring techniques. The waistcoat stitch is easy to learn once you visualize the “V” of the stitch below.
Can I sell the baskets I make from this pattern?
You are welcome to sell finished items made from this pattern, provided you credit the designer and use your own original photographs for your listings.
Holding a finished basket in your hands feels rewarding, especially once you see how well it organizes those loose items scattered around your workspace. You might consider adding a leather tag to the side or switching to a muted sage green yarn for a different aesthetic next time. Sharing a photo of your finished work helps others see the potential of this simple project, so feel free to tag your posts online. Explore more free patterns on the blog for additional home organization ideas that use your remaining stash.