Easy Crochet Beanie Pattern: Free Beginner Guide
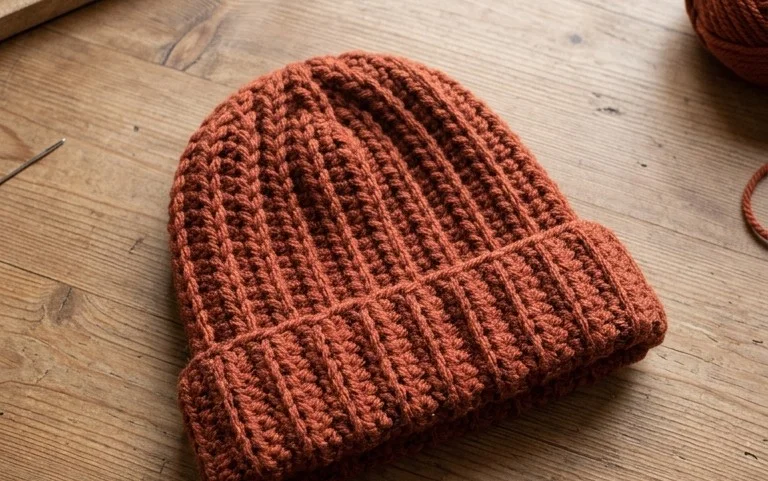
Soft, squishy yarn against your fingers makes this project feel like a warm hug during cold months. This beanie features a classic ribbed texture that mimics expensive knitwear while staying simple enough for a weekend craft session. It fits close to your head without feeling tight, providing enough stretch to keep your ears cozy all winter long. Beginners appreciate how the flat construction removes the stress of complex circular math. You will master the back loop only technique to create those clean, vertical lines that give the fabric its signature professional finish and durability.
Why You’ll Love This Pattern
This crochet ribbed beanie pattern uses a simple construction method that mimics the look of knit fabric while maintaining the speed and ease of crochet. By working in rows and utilizing the back loop only technique, you create a stretchy, warm fabric that fits snugly against the head. It is a highly efficient project that typically takes an experienced crocheter about three hours to complete from start to finish. You can easily adjust the size by changing the starting chain length, making this a versatile option for both adults and children. Because the design relies on a single stitch pattern repeated consistently, it provides a rhythmic, meditative experience ideal for busy evenings.
The texture of this hat is incredible and it actually has enough stretch to stay on comfortably without slipping. It worked up so fast that I finished two in one weekend as gifts.
— Sarah, hobbyist crafter
Pattern Overview & Skill Level
- Skill Level: Beginner
- Approximate Time: 3 hours
- Construction: Worked as a flat rectangular panel in rows, then seamed at the side and cinched at the top.
- Finished Dimensions: 18 inches circumference (unstretched), 9 inches height.
Materials & Supplies Needed
- Yarn: Worsted #4 weight, 100% acrylic or wool blend, approximately 200 yards.
- Hook Size: 5.5 mm / I-9.
- Notions: Yarn needle for seaming, scissors, and a stitch marker to track rows.
- Safe yarn substitutions: You may use a cotton-acrylic blend for better structure or a bulky #5 yarn if you adjust your starting chain to fewer stitches, though this will significantly increase the weight and thickness of the hat.
Stitch Guide & Abbreviations (US Terms)
- ch = chain
- st = stitch
- sl st = slip stitch
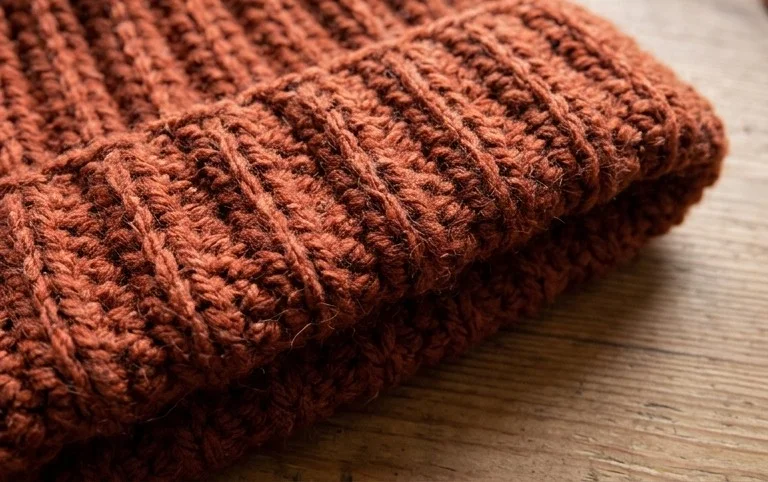
- BLO = back loop only (insert hook into the back loop of the stitch instead of under both loops to create ridges)
- RS = right side
- WS = wrong side
Step-by-Step Pattern Instructions
Main Body Panel
- Row 1: Ch 35. Starting in the second ch from the hook, work 1 sl st in each ch across. Turn. (34 sts)
- Row 2: Ch 1, working in BLO, 1 sl st in each st across. Turn. (34 sts)
- Rows 3–60: Repeat Row 2 until the piece measures 18 inches wide when laid flat.
Assembly
- Fold the rectangle in half so the short ends meet.
- With the WS facing out, sl st through the corresponding loops of both layers to seam the side together.
- Fasten off, leaving a 12-inch long tail of yarn.
- Thread the tail onto your yarn needle. Weave the needle through the ends of every other row around the top edge of the tube.
- Pull the yarn tail tight to cinch the top of the hat closed.
- Secure the center with several tight stitches and knot firmly. Weave in the remaining end to the interior of the hat.
Care & Washing Instructions
- Hand wash in cool water using a mild detergent to maintain the integrity of the acrylic or wool fibers.
- Lay the hat flat on a dry towel to air dry, reshaping it while damp to ensure it retains its circular form.
- Do not iron or bleach, as this will damage the stitch definition and reduce the natural elasticity of the fabric.
Pro Tips & Common Mistakes to Avoid
Maintain consistent tension throughout the row. If your slip stitches are too tight, the hat will become stiff and difficult to work into; if they are too loose, the fabric will lose its signature ribbing. Use a stitch marker at the end of every row to ensure you are not accidentally dropping stitches, which would create a tapered or uneven side seam. To weave in ends invisibly, feed the yarn tail through the underside of the slip stitch ridges rather than through the body of the fabric. If you want to increase the size, add more chains to your foundation; note that for every 2 additional inches in circumference, you will need approximately 20 extra yards of yarn.
Frequently Asked Questions
Can I substitute the worsted weight yarn for a thinner yarn?
You can use a lighter weight yarn, but you will need to increase the number of starting chains and add more rows to achieve the same finished dimensions, as the fabric will be less dense.
Is this pattern suitable for complete beginners?
Yes, this is an ideal first project. It teaches the fundamental skill of slip stitching while requiring no increases or decreases, allowing you to focus purely on tension control.
How do I adjust the hat for a smaller child size?
Simply reduce the number of starting chains to 25 or 28, depending on the head circumference, and stop the rows once the piece measures 16 inches wide.
Am I allowed to sell hats made from this pattern?
You are welcome to sell finished items you create using this design. I kindly ask that you credit the pattern source if listing them online.
Finishing this hat provides a satisfying sense of accomplishment, especially when you pull on that first warm, custom-made layer. You can experiment with different aesthetics by adding a large faux-fur pompom to the crown or working with two strands of fingering weight yarn held together for a marled color effect. Seeing how your work turns out is part of the fun, so please share a picture of your completed hat online. Visit the rest of the blog to find more simple patterns for your next cozy project.