Easy Felt Cutting Guide: 5 Steps for Clean Shapes
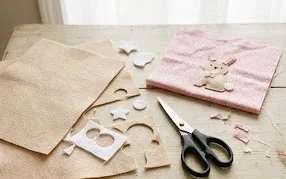
Soft wool felt has a smooth, dense surface that holds a clean shape when you cut it carefully. This small felt craft pairs neatly cut pieces with a simple crochet edge, giving beginners a chance to practice single crochet while making something useful for a gift or a bit of home decor. It feels satisfying to see a drawn outline turn into tidy shapes that sit flat without fraying, and the finished piece can be sized to suit a coaster, ornament, or small appliqué. You’ll learn how to mark felt, choose scissors that suit the thickness, and cut around curves without jagged edges. The crochet edging adds a neat finish, while steady stitches help keep the border even. Take your time with the first cut, since a clear outline and sharp scissors make the rest of the project easier to manage.
Why You’ll Love This Pattern
A cotton washcloth worked in single crochet is a useful first project: the rectangular shape is easy to check, and the fabric holds up to regular washing. This pattern uses one stitch throughout, so you can focus on keeping the edges straight and the rows even. It takes about two to three hours, depending on your pace, and one skein can make more than one cloth if you keep track of your yarn use.
The finished cloth measures about 8 by 9 inches, a handy size for a kitchen or bathroom. Cotton gives it a firm texture that works well for wiping counters or washing up. A stripe of a second color is optional, but the plain version is the simplest way to practice consistent tension.
The row count made it easy to stay on track, and the cotton cloth came out sturdy enough for everyday use.
— Anna, beginner crocheter
Pattern Overview & Skill Level
- Skill Level: Beginner. You need to know how to chain and make a single crochet stitch.
- Approximate Time: Two to three hours, including weaving in the ends.
- Construction: Worked flat in turned rows, starting with a foundation chain. Each row has the same stitch count.
- Finished Dimensions & Sizing: Approximately 8 by 9 inches after washing and drying flat. Small differences are normal because hand tension varies.
Materials & Supplies Needed
- Yarn: About 55–70 yards of worsted-weight cotton yarn, category #4. Choose a smooth, washable cotton in one color, or use two colors for optional stripes.
- Hook Size: 5.0 mm / H-8 crochet hook. If your fabric feels stiff, try 5.5 mm / I-9. If it feels loose and floppy, try 4.5 mm / 7.
- Notions: Tapestry needle for weaving in ends, scissors, and a ruler or measuring tape. A stitch marker is optional for marking the first stitch of a row.
- Substitutions: A similar-weight cotton or cotton blend is suitable. Linen-cotton yarn can feel firmer and may soften with use. Acrylic is not as absorbent as cotton, so it is less suitable for a dishcloth. A different yarn weight or hook can change the finished size and yarn use.
For a close match to the sample size, check your gauge before starting. Make a small swatch of 12 single crochet stitches across 12 rows. Aim for about 2 inches across and 2 inches tall. Change hook size if your swatch is noticeably larger or smaller.
Stitch Guide & Abbreviations (US Terms)
- ch: Chain.
- sc: Single crochet. Insert the hook into the stitch, yarn over and pull up a loop, yarn over again and pull through both loops.
- st: Stitch.
- sts: Stitches.
- rep: Repeat.
- turn: Rotate the work to begin the next row on the opposite side.
The turning chain at the beginning of each row does not count as a stitch. Work the first single crochet into the first stitch of the previous row, not into the turning chain.
Step-by-Step Pattern Instructions
Washcloth
- Foundation: Ch 26. The chain forms the bottom edge; keep it relaxed enough that the edge does not pull in.
- Row 1: Sc in the second ch from the hook and in each ch across. Turn. (25 sts)
- Row 2: Ch 1, sc in each st across. Turn. (25 sts)
- Rows 3–30: Rep Row 2 for 28 more rows. (25 sts each row)
After Row 30, check the cloth with a ruler. It should be about 8 by 9 inches, though the exact size depends on your gauge. If it is slightly longer or shorter, that is fine; keep the final row count the same for this version and use the measurement to guide your tension next time.
Finishing
- Cut the yarn, leaving a tail about 6 inches long. Pull the tail through the loop on your hook to secure it.
- Thread the tail onto a tapestry needle. Weave it through several stitches on the wrong side, change direction, and weave it through a few more stitches so it is less likely to come loose.
- Weave in the foundation tail in the same way. Trim the ends close to the fabric without cutting any stitches.
- Wash and dry the cloth according to the yarn label. Lay it flat and smooth the edges while it is damp.
Care & Washing Instructions
- For cotton yarn, machine wash with like colors in cool or warm water, up to 40°C, unless the yarn label gives different instructions.
- Dry flat for the neatest shape, or tumble dry on low if the yarn label allows it.
- While damp, reshape the corners and edges by hand. Follow the yarn label if you used a different fiber.
Pro Tips & Common Mistakes to Avoid
- Keep the foundation chain loose. A tight chain can make the bottom edge narrower than the rest of the cloth; use a larger hook just for the chain if needed.
- Count the stitches at the end of every row. There should be 25. Mark the first stitch if you tend to miss the last stitch at the far edge.
- Weave each yarn tail through the backs of several stitches, then change direction. Cutting a tail too close before securing it can let it work loose after washing.
- To change the size, add or remove chains for the width and add or remove rows for the height. Each added foundation chain adds about one stitch, and extra rows use more yarn; make a gauge swatch first if you need a specific measurement.
Frequently Asked Questions
Can I use acrylic yarn instead of cotton?
You can, but acrylic absorbs less water and may feel less suitable for cleaning. A cotton blend is a better substitute. Check the yarn label for washing instructions, since care needs can change with the fiber.
How can I make the washcloth larger or smaller?
For a wider cloth, add chains to the foundation, then work the same number of single crochets across. For a longer cloth, add rows. These changes affect the amount of yarn needed, so allow extra yardage for a larger version.
Is this pattern suitable for a first crochet project?
Yes. It uses chains and single crochet in turned rows, with no shaping or joining. Count each row to keep the sides straight, and make sure you work into the first stitch rather than the turning chain.
May I sell washcloths made from this pattern?
Check the designer’s terms before selling finished items, especially if you found the pattern on a website or in a publication. You can also describe the materials and care clearly so buyers know how to wash the cloth.
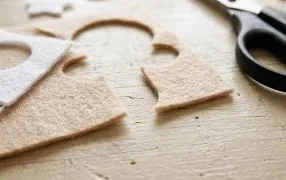
Once the felt shapes are cut and the crochet edge is finished, you’ll have a small handmade piece with tidy lines and a soft, finished border. Make a second version in a different felt color, or enlarge the outline to create a larger coaster or decoration. If you make one, share a photo on Pinterest or your favorite social platform so other crafters can see how your colors and edging turned out. Keep the scissors sharp, store leftover felt flat, and explore more free crochet and craft patterns on the blog for your next afternoon project.