Easy Flat Christmas Tree Crochet Applique: Free Pattern
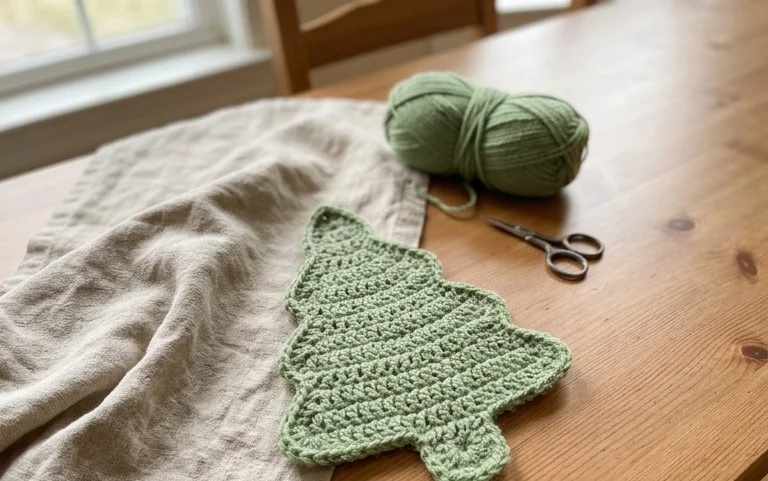
A small crocheted Christmas tree has a satisfying, softly textured feel and a shape that looks cheerful on a gift tag, stocking, or holiday card. This flat applique is a manageable project for beginners who are learning to keep their stitches even, and it gives experienced crocheters a quick way to use a little leftover yarn. Make one in classic green, or choose a color that matches your wrapping and home decor. The pattern walks you through the basic stitches and the shaping that forms the tree, with clear guidance for finishing the edges neatly. A few quiet minutes with your hook can turn a small amount of yarn into a handmade decoration you can use in several ways.
Why You’ll Love This Pattern
A worsted-weight cotton dishcloth has enough texture to scrub dishes but stays flexible enough to fold around a glass. This beginner-friendly version uses single crochet stitches worked in straight rows, so you can practice keeping even edges without managing increases, decreases, or joined rounds.
The simple shape also makes it a useful project for a quiet evening: once the first row is complete, the rest of the cloth repeats the same stitch. One ball of cotton yarn is usually enough, and the finished cloth is practical for a kitchen or a small handmade gift.
The rows were easy to count, and the cotton made a sturdy cloth that softened after its first wash.
— Jo, sample crocheter
Pattern Overview & Skill Level
- Skill Level: Beginner. You need to know how to chain and single crochet.
- Approximate Time: About 2–3 hours, depending on your pace and how often you stop to check your row count.
- Construction: A flat rectangle worked back and forth in single crochet rows, beginning with a foundation chain. There is no seaming or separate border.
- Finished Dimensions & Sizing: Approximately 7.5 × 8 inches (19 × 20 cm) after washing and drying flat. The sample gauge is 16 single crochet stitches and 18 rows over 4 inches (10 cm).
Materials & Supplies Needed
- Yarn: About 90 yards (82 m) of worsted-weight cotton yarn, #4, in one color. A solid, light color makes it easier to see your stitches while learning.
- Hook Size: 5.0 mm / H-8 crochet hook. Use the hook that gives you the stated gauge; a smaller hook makes a denser cloth, while a larger hook makes a looser one.
- Notions: Tapestry needle for weaving in the two yarn ends, scissors, and a ruler or tape measure. A removable stitch marker is optional for marking the first stitch of a row.
- Substitutions: Choose a smooth, washable cotton or cotton blend of similar thickness. Acrylic can be used for a lighter, less absorbent cloth, but it may not handle hot pans as safely as cotton. Thicker or thinner yarn changes the finished size and may require more or less yardage; make a gauge swatch first.
Stitch Guide & Abbreviations (US Terms)
- ch: Chain. Yarn over and pull through the loop on your hook.
- sc: Single crochet. Insert the hook in the stitch, yarn over and pull up a loop, then yarn over and pull through both loops on the hook.
- st / sts: Stitch / stitches.
The turning chain does not count as a stitch in this pattern. Work the first single crochet into the first stitch of each row, directly beside the turning chain. This keeps the edges straight and maintains a count of 30 stitches across.
Step-by-Step Pattern Instructions
Check your gauge before starting if you want the cloth close to the listed dimensions. Make a 4-inch swatch in single crochet, then adjust your hook size if you have more or fewer than 16 stitches across. Chain loosely so the starting edge does not pull in.
Foundation: Ch 31. The foundation chain is not included in the row stitch count.
Row 1: Sc in the second ch from the hook and in each ch across. Turn. (30 sts)
Row 2: Ch 1, sc in each st across. Turn. (30 sts)
Rows 3–10: Repeat Row 2 for each row. At the end of every row, you will have 30 sts.
Rows 11–20: Continue in the same way, chaining 1, working 1 sc in each st across, and turning. Each row has 30 sts.
Rows 21–32: Repeat the same row pattern through Row 32. Each row has 30 sts. After Row 32, the cloth should measure about 8 inches long if your row gauge is 18 rows per 4 inches.
Finishing: Cut the yarn, leaving a tail of about 6 inches (15 cm), and pull the tail through the final loop to fasten off. Thread the tail onto a tapestry needle. Weave it through several stitches on the wrong side, then change direction and weave through a few more stitches so it is less likely to loosen in the wash. Secure the starting tail in the same way. Wash and dry the cloth according to the yarn label, then measure it. The finished width may vary slightly with tension.
Care & Washing Instructions
- For cotton yarn, machine wash with similar colors in warm water, up to about 40°C (104°F), unless the yarn label recommends a cooler wash.
- Tumble dry on low or lay the cloth flat to dry; reshape the edges while it is damp.
- Block lightly by smoothing the corners and sides into shape. For a cotton blend or an unknown fiber, follow the care directions on the yarn label.
Pro Tips & Common Mistakes to Avoid
- Keep the edge relaxed: Tight turning chains can pull the sides inward. Make the ch 1 at the start of each row at the same comfortable tension as your regular stitches.
- Count before turning: Check that each row has 30 single crochets. If you keep losing the first or last stitch, place a removable marker in the first stitch of each row and move it up as you work.
- Hide ends securely: Weave each tail through the backs of several stitches, then change direction. Avoid cutting the tail close to the fabric before washing, since cotton can shift slightly with use.
- Adjust size with a plan: For a wider cloth, add chains to the foundation; each extra chain adds one stitch to the row. Add rows for more length. A larger cloth uses more yarn, so have an extra ball available if you increase both dimensions.
Frequently Asked Questions
Can I use a different yarn fiber?
Yes. Cotton is absorbent and holds up well to frequent washing, which suits a dishcloth. A cotton blend is also a reasonable choice. Acrylic tends to absorb less water and may melt or scorch if used near hot cookware, so do not use this cloth as a hot pad.
How can I make the dishcloth smaller or larger?
Change the foundation chain to adjust the width, keeping an odd number of chains so the first row still begins in the second chain and gives you one fewer stitch than the chain count. Add or remove rows to change the length. The yarn amount will change with the finished area.
Is this dishcloth suitable for a first crochet project?
Yes, if you can chain and make single crochet stitches. The main challenge is finding the first and last stitch consistently. Count the 30 stitches at the end of each row, and use a marker at the row edge until the stitch placement feels familiar.
Can I sell dishcloths made from this pattern?
Check the designer’s terms before selling finished pieces, especially if the pattern came from a published source. If you sell your work, describe the yarn and care instructions accurately, and do not claim another designer’s pattern as your own.
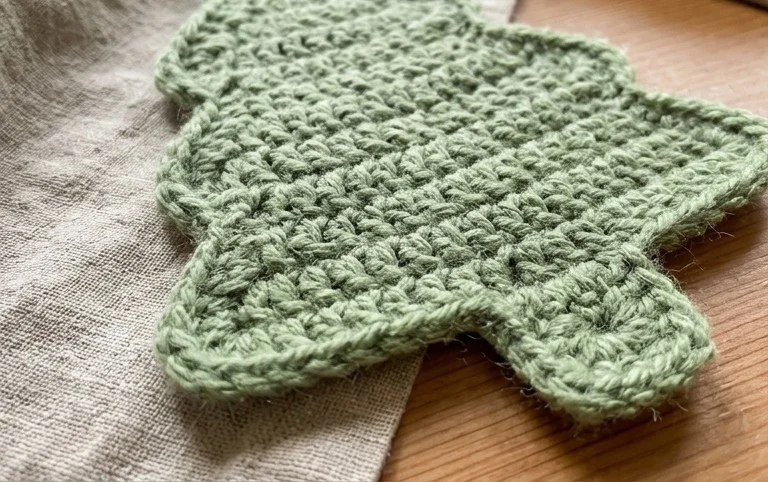
Your little tree is ready to add a handmade touch to a present, card, or corner of your holiday decor, and finishing one is a lovely way to use a small amount of yarn. For a simple variation, try a second tree in white or gold, or use a slightly larger hook and thicker yarn to make a bigger applique. You can also add a small stitched trunk or a few embroidered dots after the crochet is complete. If you make one, share a photo on Pinterest or your favorite social media platform so others can see your colors and finishing ideas. Then browse the blog for more free crochet patterns to make for the season and beyond.